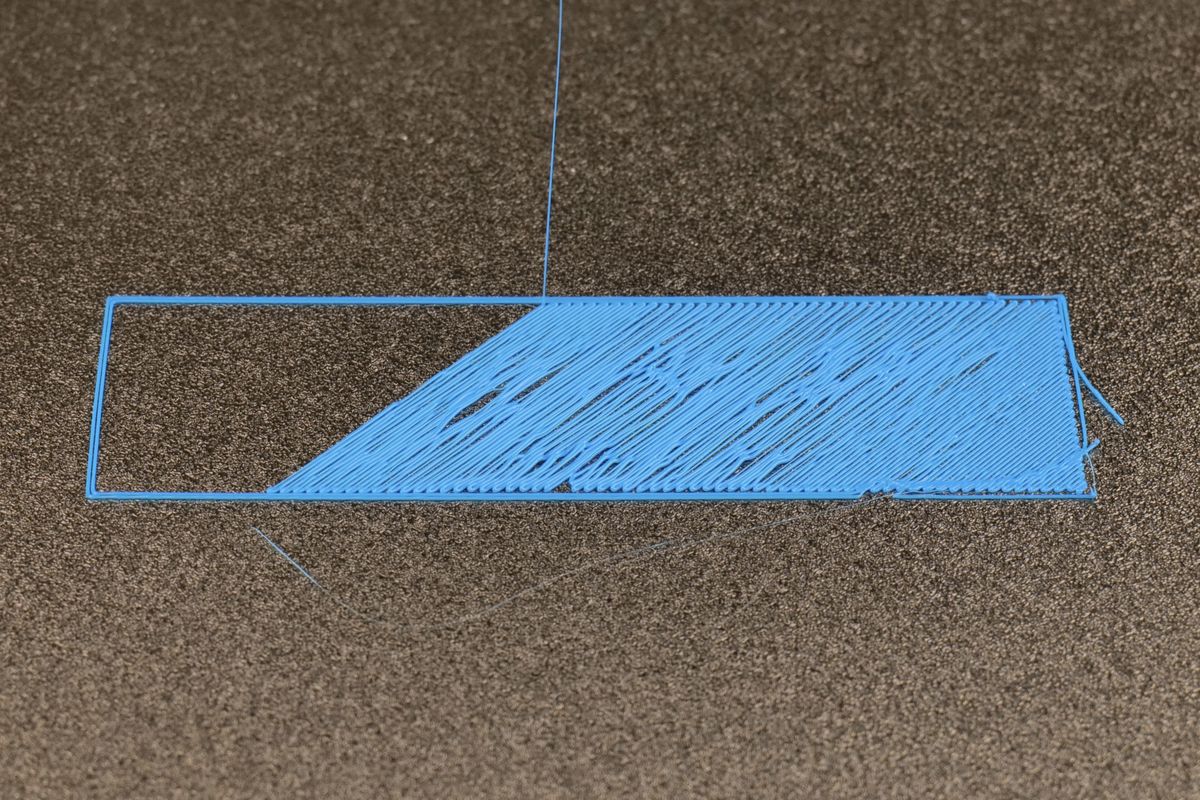
Why Won't My First Layer Stick to the Bed? Causes, Fixes & Prevention
Why Won't My First Layer Stick to the Bed? Causes, Fixes & Prevention
There's nothing more frustrating than starting a 3D print, walking away, and coming back to find a tangled mess of filament spaghetti where your model should be. If your first layer won't stick to the bed, you're dealing with one of the most common—and thankfully most fixable—problems in 3D printing.
The first layer is the foundation of your entire print. Every layer above it depends on that foundation being solid, which is why getting it right matters so much. Let's break down exactly why this happens and how to fix it.
The Most Common Causes of First Layer Adhesion Problems
First layer failures usually come down to three things: the nozzle is too high or too low, the bed temperature isn't right for your material, or the build surface is dirty or unsuitable. Sometimes these issues stack up together, causing corners to lift or prints to fail completely.
Incorrect Nozzle Height (Z-Offset Problems)
Your nozzle's distance from the bed is perhaps the single biggest factor in first layer success. If the nozzle sits too high, the filament barely touches the bed and won't stick. If it's too low, the filament gets squished, causing ridges or even clogs.
The sweet spot is when your first layer lines are slightly flattened—not round (too high) and not paper-thin or transparent (too low). You want to see distinct lines that are gently pressed into each other without gaps.
How to fix it:
- Use your printer's Z-offset adjustment to fine-tune the nozzle height
- Run a first-layer calibration test print
- Adjust in small increments (0.02-0.05mm at a time)
Many modern printers like the Bambu Lab P1S ($549) and Creality K1 ($329) include automatic bed leveling that handles much of this for you, but even automated systems sometimes need manual Z-offset tweaks.
Poor Bed Leveling
Even with auto-leveling features, an uneven bed can cause adhesion nightmares. If one corner sticks perfectly while another won't grab at all, your bed likely isn't level relative to your nozzle's movement path.
How to fix it:
- Run your printer's built-in leveling routine
- On manual machines, use the paper test method (a sheet of paper should drag slightly under the nozzle)
- Check that your bed springs or adjustment knobs haven't loosened over time
Dirty or Contaminated Build Surface
Oils from your fingers, dust, and leftover residue from previous prints can all prevent proper adhesion. A dirty build plate is one of the most overlooked causes of first layer problems.
How to fix it:
- Clean your bed with isopropyl alcohol (90% or higher) before printing
- Avoid touching the print surface with bare hands
- For stubborn residue, use warm water and dish soap, then dry completely
- Replace worn or damaged build surfaces
Wrong Bed Temperature
Different filaments need different bed temperatures to stick properly. The bed temperature isn't right for your material is a phrase you'll hear often in troubleshooting forums.
Recommended bed temperatures:
- PLA: 50-60°C
- PETG: 70-80°C
- ABS: 90-110°C (enclosed printer recommended)
- TPU: 40-60°C
Printers with enclosed chambers like the Qidi Tech Q1 Pro ($399) or Bambu Lab P1S ($549) maintain more stable temperatures, which helps significantly with materials that are prone to warping.
Cooling and Environmental Factors
Too much early cooling or drafts can cause the bond to fail. If your printer sits near a window, air vent, or in a drafty room, those temperature fluctuations can wreak havoc on first layer adhesion.
How to fix it:
- Disable the part cooling fan for the first 1-3 layers in your slicer
- Move your printer away from drafts and vents
- Consider an enclosed printer if environmental control is difficult
Wet Filament
Filament absorbs moisture from the air, and wet filament prints poorly. You might notice popping sounds, stringing, or a rough surface texture. Wet filament is a common but often overlooked cause of adhesion problems.
How to fix it:
- Store filament in airtight containers with desiccant
- Dry filament in a food dehydrator or filament dryer (4-6 hours at 45-55°C for PLA)
When to Use Bed Adhesives
If you've done everything else but your first layer still won't stick, bed adhesives are a legitimate solution. Common options include:
- Glue stick: Cheap, easy to apply, works well with PLA and PETG
- Hairspray: Light coating helps with various materials
- Specialized adhesives: Products like Magigoo or 3DLac offer material-specific formulas
Some experienced users avoid adhesives entirely, but there's no shame in using them—especially for tricky materials or large prints with lots of bed contact.
Slicer Settings That Improve First Layer Adhesion
Your slicer settings can make a significant difference:
- First layer height: Use a thicker first layer (0.2-0.3mm) for better squish
- First layer speed: Slow down to 20-30mm/s for the first layer
- First layer flow/extrusion width: Slightly increase (105-110%) for better contact
- Brim or raft: Add these for parts with small footprints or sharp corners
Choosing a Printer with Better Adhesion Features
If you're still shopping for a printer, certain features make first layer success much easier:
- Automatic bed leveling: Standard on most modern printers
- Textured PEI build plates: Excellent adhesion for most materials
- Enclosed chambers: Better temperature stability for warping-prone materials
- Reliable Z-offset calibration: Makes fine-tuning easy
Budget-friendly options like the Creality Ender 3 V3 SE ($169) include automatic leveling that helps beginners avoid common pitfalls. For those printing with ABS or other temperature-sensitive materials, enclosed options like the Creality K1 ($329) or Elegoo Centauri Carbon ($438) provide better environmental control.
Not sure which printer fits your needs? Take our printer quiz to get personalized recommendations based on your budget and materials.
FAQ
How do I know if my nozzle is too high or too low?
If your first layer looks like thin, separate strands that don't connect, your nozzle is too high. If the filament looks smeared, transparent, or the nozzle drags through the layer, it's too low. A proper first layer should have slightly flattened lines that bond together without gaps.
Why does my print stick in the middle but not the corners?
This typically indicates a bed leveling issue. Your bed may be slightly warped or not properly leveled across its entire surface. Run a full-bed leveling calibration andconsider using a 5×5 or 7×7 mesh leveling grid if your printer supports it, as this compensates for warping across the entire surface rather than just the four corners.
My print starts fine but lifts at the corners — what's happening?
Corner lifting, or warping, is most common with ABS and ASA filaments. The solution is to increase your bed temperature (90–110°C for ABS), slow down the first layer speed, use a brim in your slicer to add extra adhesion area, and ideally print in an enclosed printer to maintain a stable ambient temperature. PLA rarely warps — if corners lift with PLA, the bed temperature is usually too high or the cooling fan too aggressive on the first layer.
Not sure which printer to buy?
Take our 2-minute quiz and get a personalised recommendation.
Find my printer →